NEW Rewards Programme - Start saving today to get a 10% off voucher
Part 4 - Rings and varnish
Now our rings are prepared, the feet and shoulders are ground flat and smooth. We must space the rings on the blank, whip them in place and seal the whippings with varnish.
Ringing
This is a 9ft rod and we have one lined butt ring, eight snake rings and a hayfork tip to fit to the blank. The position of the tip ring is fairly obvious; the position of the other ring can vary a little. My ring spacings are:
Ring spacing (in inches, measured from the rod-tip to the centre of the ring)

All spacings are measured from the tip and the sections should be pushed fully home before you measure and position the ring.
In theory the sections for a 9ft rod are all one length and the joints should fall at 29.5, 59 and 88.5 inches from the tip - they rarely do. On this rod the first two joints come at about 28.25 and 55.5 inches. The ring spacings I’ve used mean that the last rings on the first and second sections fall above the joints, leaving sufficient room to finish the female side of the joint.
Other builders use different blanks and different ring spacing. For example, if you have a US-built rod or research US rod-building websites you’ll find they tend to use ten guides on a 9ft #5 rod.
US ring spacings
(these come from well-known US rod-building sites or rod-making companies)

Comparing these spacings to the actual dimensions of my blank - the first two have five rings on the tip section with that fifth ring actually on the joint, the third has a ring immediately below the joint. They would all work, but not the way I like.
Depending on the blank you’re working with and the way you want the rings to fall, you must make your own decisions. I’d urge that when you come to lay out the rings you should work out the spacings once you have actually assembled the blank and measured where the joints fall along the length of the blank.
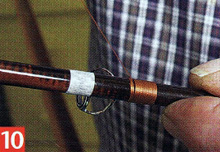
Measure the spacing from the tip to the centre of the ring. Use masking tape to position each ring so that it is in line with the tip. Sight down the blank to make sure the rings sit correctly before you whip them in place.
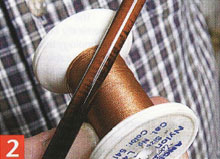
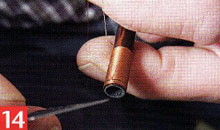
Modern nylon rod-building threads come in many colours. I prefer to match the thread to the blank.
TIP: Before you start whipping: make sure you have plenty of light. I prefer daylight but I do also work under a bank of daylight-balanced fluorescent tubes; make sure you have enough thread; have a couple of fresh blades to hand; single-sided razor blades or craft-knife blades; pick a comfortable chair.
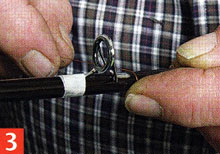
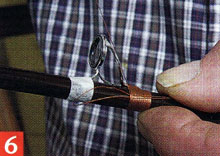
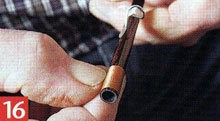
To whip a ring, remove the tape from one leg of the ring, start winding the thread around the blank and wind the thread up onto the foot of the ring. Trap the thread with your forefinger and roll the blank between your thumb and other fingers - it gets easy with practice! Start with a good length of thread from the spool - hold about 6 inches in your hand - take one turn and trap it in place.
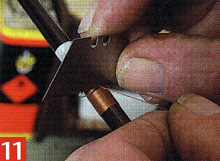
Make two or three turns, then use your blade to cut off the waste thread. Don’t throw that piece of thread away - you’ll need it to complete the whipping. When you cut thread against the blank make sure the thread is tight, and simply press the blade against the thread. Make sure you don’t damage the blank.

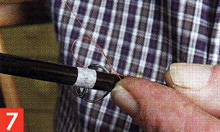
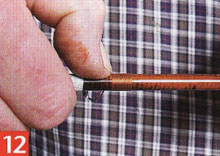
Things get easier when you have the thread secured and the waste trimmed. I’m right-handed, so I use my right hand to turn the blank and my left to keep steady tension on the thread. Turn the blank and gently angle the thread to make neat touching turns. As neat as possible, the wraps will get tidied later.
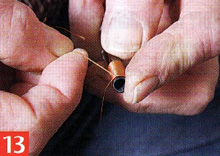
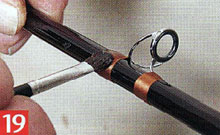
With a few wraps still to go, take the length of waste thread, make a loop and catch it in before making the final few turns of thread. The closed end of the loop points at the ring.
Cut the thread you’ve been winding, leave about six inches to work with, and push the end through the loop. You can see I’m holding the turns of thread in place withmy forefinger.
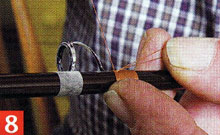
Hold the thread wraps in place with your forefinger and pick up the ends of the loop with your thumb and second finger. Gently pull the loop back under those last few thread wraps. Keep tension on the end of the thread with your left hand too. (Yes, an extra hand would be useful).
Pull the end under the wraps and that whipping should be secure.
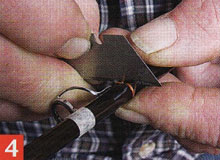
The next job is to trim off the waste thread. Obviously you’ll want to cut close and neat - so there are really two problems: how to get close, and how not to cut the thread already around the blank. What I do is pull the loose end towards the ring and make a little gap in the thread…
…and cut as close as possible - without damaging the blank.
Then I use my thumbnail to close the gap and to even up and close any spaces between the turns of thread. Then I take the tape off the other foot and repeat the process. It can be a good idea to check your ring has stayed in line before you complete the second whip.
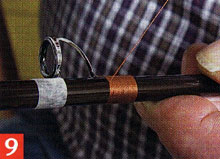
At each joint, I whip the female side. In the early days of graphite rods that whipping helped reinforce the joint; these days most rod joints have sufficient reinforcement inside the blanks, but I think that the rod looks more finished with that whipping. Don’t work too close to the end, and finish the whipping the same way you completed the rings.
Make a little gap so you can cut the thread as tight as possible with no tag.

Close the gap by pushing the thread with your thumbnail.
Tighten and even the wraps by rubbing them gently - you can buy a burnishing tool for this job, but unless I’m working with silk thread my thumbnail works fine.
This stage is complete when all the rings are securely whipped in place, the joints have been finished and a short whipping has been wound tight in front of the winding check which sits in front of the cork handle.
If you have decided to include a keeper that should be in place, too.
Varnishing
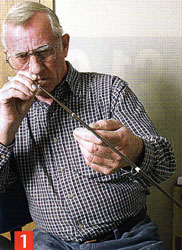
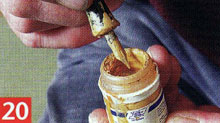
The next stage is varnish. I use a low-build two-part epoxy varnish. When you mix any epoxy it starts stiff and gets softer and as you mix you’ll beat some air bubbles in there - expect it, it can’t be helped.
One of the challenges of using this type of varnish is you don’t want bubbles on the finished rod. All epoxies get warm, even hot, when the resin and hardener are mixed and as they heat up they get a little runnier and the bubbles start to come out.
TIP: I take this practical fact one step further. When I come to varnish a rod I get my workshop as warm as possible, maybe 25 to 30 degrees - hot! And I keep it that way for a few hours before I start, and while I apply the varnish and while the rod dries.
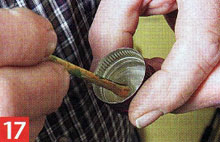
Thoroughly mix equal parts of hardener and resin. If they are pre-warmed they will be easier to mix, but they will set a little more quickly. I mix small quantities and repeat as I need more.
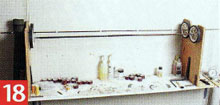
My home-made jig supports the rod sections while I turn the blank and apply the varnish. I can then set it to turn the blank while the varnish sets.
To help with the actual varnishing you don’t need a jig with wheels - two pieces of board with vee notches in them will work well. And you can simply turn the blank by hand until the epoxy has set sufficiently.
(For a slightly more elegant solution to the problem, a Stonefly rotary drier comes with a rod stand and a purpose-made chuck to hold the end of your blank).
TIP: You’ll probably need to varnish each section a few rings at a time. It’s slow, but there’s less chance of touching wet epoxy and leaving a permanent mark. If you’ve varnished a couple of rings let the varnish dry before you do some more. Move on to one of the other sections. Take your time and the rod will look better for it.
Simply hold the brush in place and turn the blank. Epoxy is ‘self-levelling’ but an even coat is ideal. The varnish fully covers the thread and just onto the blank - avoid ‘rugby balls’!
TIP: If you have any dust or greasy spots on the blank clean it with a little clear meths before you start. Let it dry completely before you start to varnish.
The final step is to write the rod details on the butt. I use a nib pen and acrylic paint.
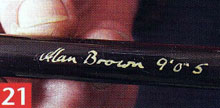
Let it dry and seal it with a layer of varnish.
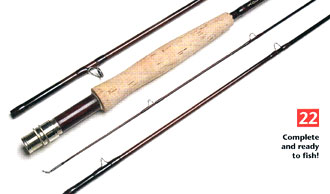
Complete and ready to fish!