NEW Rewards Programme - Start saving today to get a 10% off voucher
The step by step guide to building the perfect carp rod
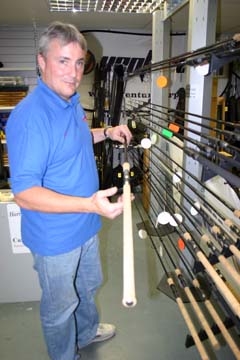
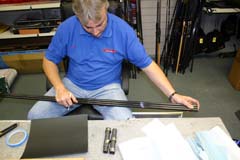
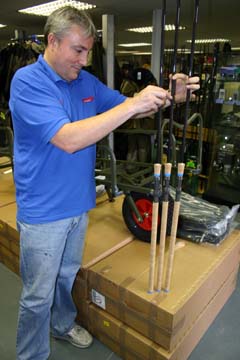
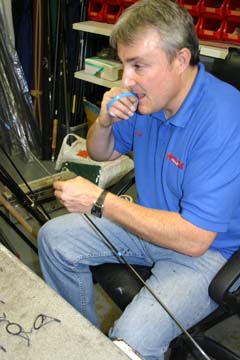
Bob Davis custom building 3 matching Carp rods
Fosters of Birmingham is one of the largest shops in the Midlands area, but they are unique in that they are probably the only Fishing Tackle Retailer who has an on site resident Rod Builder, in Bob Davis, or more commonly known as "Bob the Rod" Bob has worked for Fosters for 25 years, first as a "Maggot boy" but for the last 20 years he has been building and repairing rods. Bob will custom build any type of Rod for you, repair a broken section on a pole or replace a single guide on a favourite rod. Today he is custom building 3 matching Carp rods. The Blanks are Harrison Chimera 12 foot 2 ¾ Lbs test curve. It will be built with Fuji BSVLG Guides and a Fuji Reel seat. The Customer has Chosen a more classic style in that he has requested full Cork handles.

Step 1.
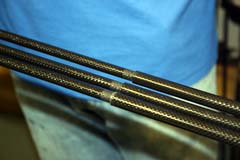
He assembles the three rod blanks, and gives them a visual inspection, to see that there are no scratches , or cracks in the blanks, and importantly when building a matching set that the three rods are exactly the same length and that the joints line up.
Step 2.
Bob then marks each butt section and tip section so that when building he does not get them mixed up, he does this with a wrap of tape.
Step 3.
Bob then takes a china graph white pencil and marks the position where he needs to fit the Fuji Reel seat, this is 25 inches from the base of the blank to the top of the reel seat.
Step 4.
He then marks all three blanks up exactly the same.
Step 5.
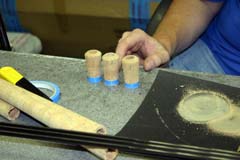
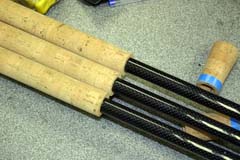
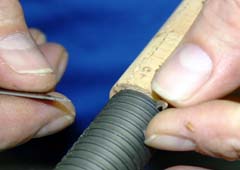
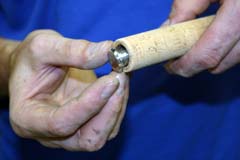
Bob is using a full length cork and he needs a two inch flared section to be above the reel seat, so he measures this down two inches and wraps thin blue tape around the cork, this tape acts as a guide for when he is cutting it and it also helps prevent the cork from chipping during cutting, and if any excess glue is forced out later on the tape helps keep it clean.
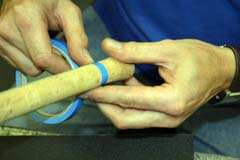
Step 6.
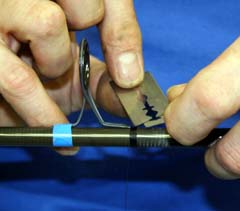
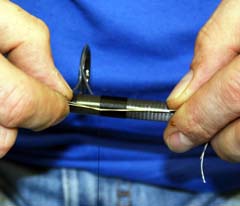
Bob uses a sharp craft knife for cutting through the cork, he rotates the cork whilst cutting. Rather than cutting through from one side, this gives a better cut which is also nice and square.

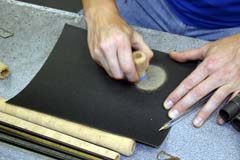
Step 7.
He then lightly sands the cut face on a sheet of sand paper, by sanding in a circular motion. This ensures a good fit to the end of the reel seat.
 |
 |
Step 8.
Bob then uses the short cut flare as a guide to cut the corks for the other two rods, in this way he is constantly ensuring that the three rods will be exactly the same.
 |
 |
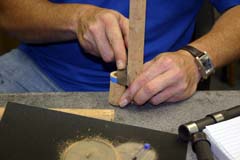
Step 9.
The next job is to measure from the bottom of the reel seat to the base of the blank and to cut the cork to length for this. The cork should end up being a fraction longer than the blank, again tape the cork, cut and sand as we did for the short section. when you are happy cut the other two corks to match
 |
 |
Step 10.
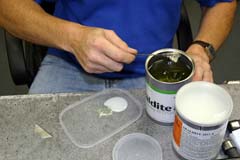
Bob is then ready to glue the corks and reel seats into position first he mixes enough glue, Bob uses Araldite glue in bulk cans as he uses a lot but Seymo Pro - Bond is also very good. Bobs tip is to keep a cloth rag handy to keep your hands clean and mop up any spills, also to mix more glue than you will need as it is better to waste a little than not have enough, mixed. When you have thorough mixed the glue apply it generously to the blank, Bob applies it to the top half of the blank where the cork will fit then with a twisting turning motion he almost screws the cork down the blank, this forces the glue down the whole length of the blank and under the cork handle care must be taken that you do not force the blank down too far, check the marks you made on the blank earlier.
 |
 |
 |
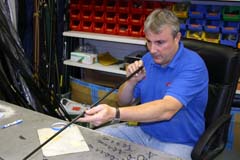
Step 11.
He repeats this with the two other blanks and handles note if any surplus glue is forced out he removes large amounts with his mixing stick but that's it he lets it dry hard, before trying to remove the rest.
Step 12.
Do not rush this part wait until the rods are really dry before fitting the reel seat.
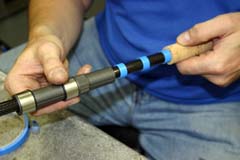
Step 13.
Next we have to build up the blank in the area where the reel seat will fit, Bob does this with narrow blue tape & Bob repeats this in three to four places along the area that the reel seat will be glued, with gape of about one inch between each section of tape, this ensures a good fit and plenty of area for the glue to get a really good bond between the blank and the reel seat.
 |
 |
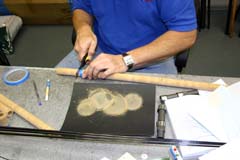
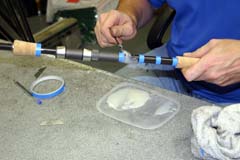
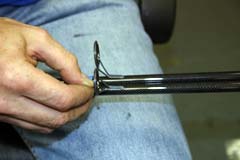
Step 14.
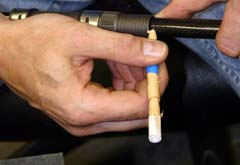
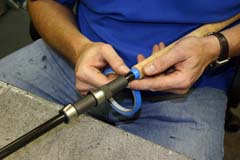
He adds a small amount of tape under the position where the top cork will go again to give the right fit, Bob mixes a fresh amount of glue and spreads it over the built up areas of tape and onto the blank He then pushes the reel seat down, in a twisting motion (pic 139-3989), he follows the same procedure with the top cork and finally the SSWC stainless steel top collar that fits over the end of the top cork It is important to remember that with small amounts of glue that ooze out let them dry before trying to remove. The reel seat and handle is then left to dry.
 |
 |
 |
Step 15.
Bob repeats the whole procedure with the other two blanks.
Step 16.
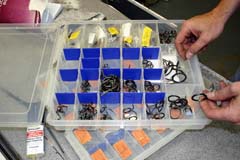
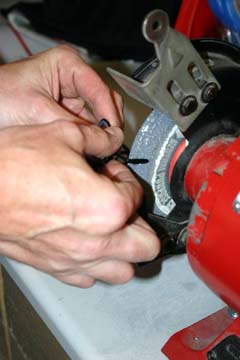
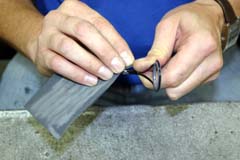
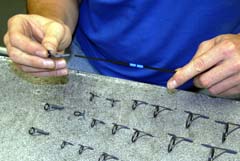
Rod guide selection Bob opens his stock box of guides and selects the Fuji guides he will be using Bob then sets about grinding a small taper onto the front face of each rod guide foot, this can be done with a small file but for speed Bob uses a grinding wheel he then takes some fine emery cloth to give that fine finish and to make sure there are no sharp bits that will snag the thread during whipping.
 |
 |
 |
Step 17.
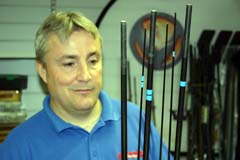
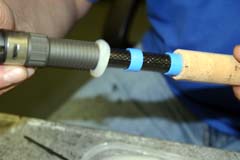
Bob lays out the three sets of rod guides in order and checks that the tip top is the correct fit on to the tip of the blank. It should not be too tight that you can not get any glue under it, but again not to lose.
Step 18.
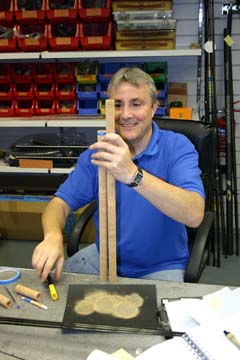
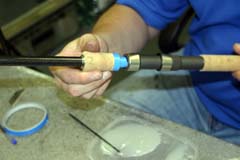
The Rods are nice and Dry, Bob assembles the tip section to the butt, and looks down the length of the blank to see if there is a slight bend in the top section, if there is he twists the top section around so that bend will be on the opposite side to that of the rod guides, Note the position on the reel seat as the reel seat must be in line with the rod guides.
Step 19.
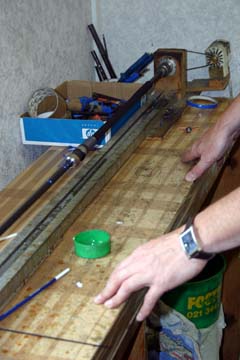
He then measures and marks the position of each rod guide using a white china graph marker (we give typical rod guide spacings at the end), Bob then tapes the front foot of each Guide over his measured marks, again he checks alignment to the reel seat and of each rod guide. He repeats the procedure with each rod, using the first as a template to measure the next one too.
 |
 |
Step 20.
Bob starts to whip on the foot of the first rod guide. To assist him he cuts a 6 inch length of strong cotton, of some monofilament line would work. He folds this in half making a loop in the one end. (Keep this handy) Thread there are lots of makes of thread on the market but use a good quality one Guides n Blanks sell Fish Hawk and Gudebrod thread, a spool taken from the wife's sewing box is not good enough. For carp rods grade A is best.
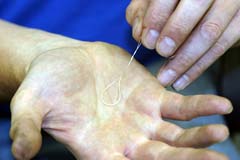
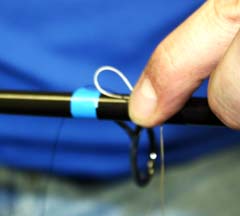
Step 21.
Pass the thread over the blank, and under itself again so that the subsequent turns of the thread trap the lose end, you need to hold it in place at this stage with your thumb.
 |
 |
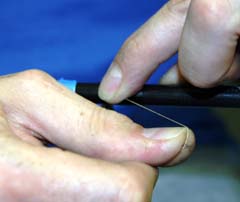
Step 22.
Continue to rotate the rod blank winding the thread on in touching turns, over and over the lose end about 5 to 10 turns is enough.
Step 23.
The lose end can know be safely trimmed off with a razor blade. Note you must keep tension on the main end of the thread or the whole thing will un wind it self Bob achieves this by holding the spool of thread between his knees.
 |
 |
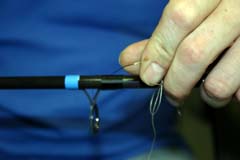
Step 24.
Then continue to wrap the thread along and up the foot of the rod Guide.
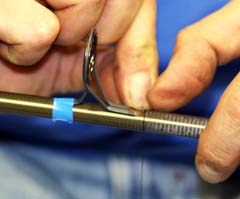
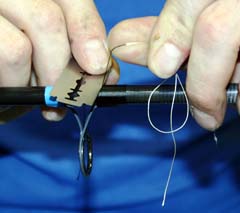
Step 25.
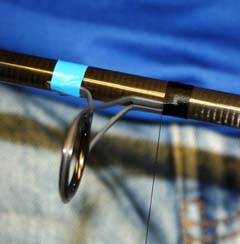
When you are with in 1/8 inch of reaching the leg of the rod guide insert the strong cotton or mono loop.
Step 26.
Keep wrapping the thread over the top of this loop until you reach the base of the leg of the rod guide.
Step 27.
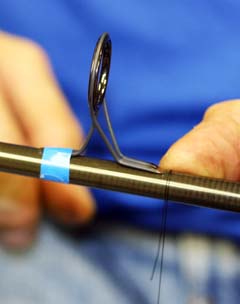
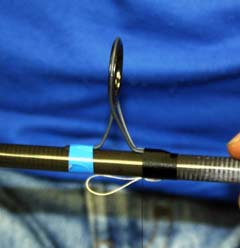
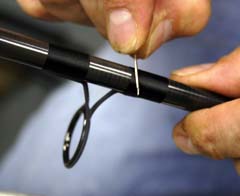
Use your thumb to hold it all in place and cut the thread from the main spool, pass the cut end through the mono loop.
Step 28.
Holding all in place with your thumb, pull the end of the mono loop, this pulls the lose end back through and under the wraps that you have made the whipping is know secure.
 |
 |
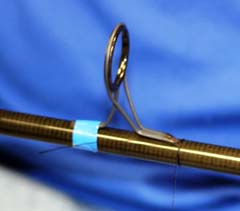
Step 29.
The lose end can be trimmed of close. Use a razor blade for this.
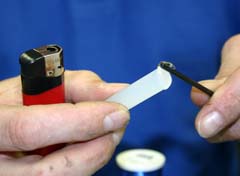
Step 30.
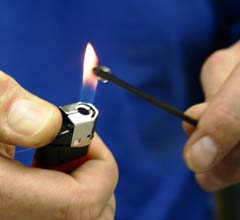
Some times the trimming can leave a fine filament from the thread , use a cigarette lighter to carefully burn this off, but take care !
Step 31.
If you have any slight gaps in the thread these can normally be pushed up with your thumb nail, if there are areas where the thread has crossed over it self, you can use a needle to rum over this to burnish the threads down.
Step 32.
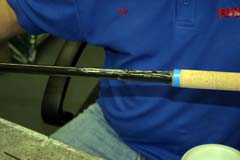
Decoration a lot of Rods have a small area of coloured thread, like silver, gold , in this case blue added to the whipping, this is called tipping. Basically you need to follow exactly the same procedure as described above but you only apply may be 5 to 6 turns of thread. It pays to count them so you get each whipping the same.
 |
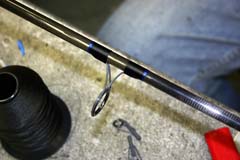 |
Step 33.
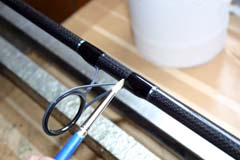
This it the time consuming part but each foot has to be whipped in the same manor front and back foot. Check again that all the guides are in line, by looking down the whole length of the rod, if one is out of line, it can generally be pushed left or right, to get it to line up.
Step 34.
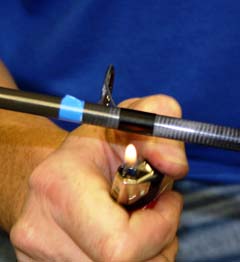
The tip top can be glue on Bob likes Seymo Hot melt Glue. As the tip guide of a rod it the one most likely to get damaged during fishing, hot melt glue can easily be re melted and a new tip top replaced. Melt the stick of Glue with a lighter and roll it onto the top of the blank.
Step 35.
Re melt the glue that is on the blank them push the tip top on check the alignment, with the rest of the guides.
 |
 |
Step 36.
Tip tops often have a small amount of whipping behind the tube, to give it strength and to finish it off this is done in exactly the same way as mentioned previously.

Step 37.
Bob inspects the rod and uses a sharp knife blade to pick off any harden glue that has escaped.
 |
 |
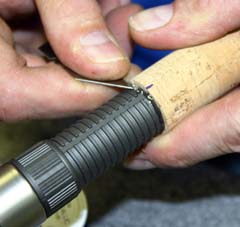
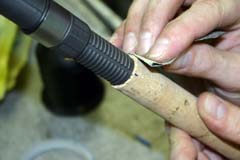
Step 38.
Bob then sands down the edges of the corks so that they blend in nice and the base of the butt section so that he can glue in the Stainless Steel end cap.
 |
 |
 |
Step 39.
When he is happy with the result Bob cleans the whole rod down to remove any dust, stray glue, finger marks etc, using a soft cloth rod and thinners.
Step 40.
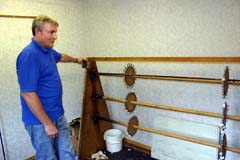
Because Bob builds a lot of rods he is lucky enough to have a separate room where he applies the epoxy finish and has a rod turner that turns the rods while they are drying, this room is kept dust free and is extremely warm. Bob loads the rod section into the turning machine. But if you are building just one rod or two Rods check out the Stonefly Fly Dryer/ Rod turner, this is relatively in expensive and does a really good job.
Step 41.
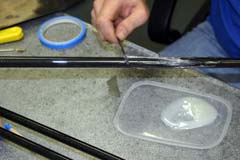
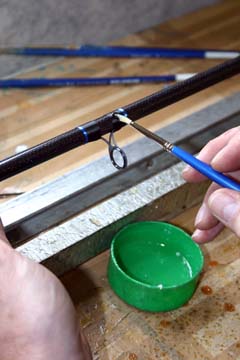
Bob boils a kettle and pours the hot water into two cups where he stores the Flex coat epoxy rod finish, saying the warmer the better.
Step 42.
He mixes equal amounts of the epoxy into a small plastic cup, he then mixes it until it is clear and he has removed all of the bubbles.
Step 43.
Using a small nylon brush he applies the first very thin layer.
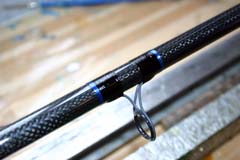
Step 44.
This shows how thin a coat of epoxy has been applied. This gives a good base for the final coat and it tightens up the whippings, by making them shrink.
Step 45.
Bob likes the epoxy to be a little thicker for the final coat, so he leaves it for a while , just to thicken slightly and applies this to the whippings, he checks each whipping to see that no little air bubbles have formed in the epoxy, if there are he gently blows the whipping to burst these.
Step 46.
The Blank is placed into the drying machine and left to fully harden off.
Step 47.
It is then inspected, polished with a house hold polish and is ready for sale. All the parts used in this feature are available on line at www.Guidesnblanks.com